


homeaboutcontactdisclosure
Showing posts with label stripes. Show all posts

Thursday, July 4, 2013

Happy Independence Day! 4th of July Nail Art


Happy Independence everyone!

The weather is icky and I'm busy packing.
Even though I can't join in on barbecues, bonfires and fireworks I thought I'd still get in on the nail art festivities!

I got up early to work on my 4th of July nails, and let me tell you it took me over 6 hours!
I changed my look about four times before settling on something simple.


My thumb is is a two layer base of Sinful Colors "Snow Me White" with a simple glitter gradient of Julep "Fireworks."

My index finger is one layer of China Glaze "Adventure Red-y" with a large silver star from my Born Pretty Store Stud Wheel.

My pinky finger in two layers of La Girl 3D Holo "Brilliant Blue" with another large stoar from BPS.


Now the glitter placement on my middle finger took incredibly long.

Before I began, I painted two coats of LA Girl 3D Holo "Brilliant Blue".
Not having any glequins around, I reached for My Pink Dreams "Casa Blanca" and individually fished and placed each hex glitter until I reached exactly 50 to imitate the stars on the American Flag.
I sware, it had to have taken over an hour as I kept losing count. Haha!

My ringer didn't take as long.
I began with a two layer base of Sinful Colors "Snow Me White" and then placed 6 evenly spaced pieces of nail tape over the nail.
I then painted over the gaps with LA Girl 3D Holo "Sparkle Ruby" and removed the tape to reveal 13 stripes in total matching the stripes on the American Flag once again.


Overall it's a simple, wearable option for any patriotic outfit.
I had more intricate, over the top designs half finished...but sometimes less is more.

What do you think of the 4th of July look?
Did your nails show your patriotic spirit today?


Let me know in the comments below and send me your 4th of July nails on Facebook or Twitter!
And don't forget to give this look some love on Facebook, Instagram, Tumblr and Pinterest!

---

I apologize for being short of words this week.
I officially begin moving into my new place tomorrow.
I tried so hard to post regularly, but I know I've been bad and disappeared for one, to up to four days at a time.

After this weekend, things will be back to normal. 
I promise!

Meanwhile, I've reached over 500 followers on Instagram,
almost 1000 on Tumblr,
and approaching 500 on Facebook!

I cannot thank you all enough for your support.
Once I'm officially moved and settled, I'll be scooping up prizes for a huge giveaway to thank you.

You all are truly lovely and amazing.

Thanks for reading, be safe, and have fun tonight!

-Melody

Monday, June 24, 2013

Color Club "Reign In Spain" (Birchbox Wanderlust Exclusive) & Funky Striped Nail Art


 Hi everyone!

According to the calendar, summer is officially here! 
That means it's time for travel and adventures under the sun.

Whether you breaking out neons, glitterx or hanging on to your spring pastels, your summer nails should be bright.

This month Color Club and Birchbox had their subscribers covered.

Photo Courtesy of Birchbox.com


 The Wanderlust Collection includes four mini (7ml, 0.5 fl.oz) polishes, an exclusive to Birchbox.
The set retails for $8.00 and can be purchased here at Birchbox.com.

The mini collection includes three neons shades and a stark off-white:

From left to right:

Reign in Spain
Mod in Manhattan
London Calling
Pardon My French

Every Birchbox subscriber received one of the four polishes in their June box.


Included in my own box was Reign in Spain.


Reign In Spain is a super neon, coral creme.
(One coat shown over Sinful Colors "Snow Me White.")


If only the camera could capture the true color. 
You heard me say it before and I'll say it again. Neons are impossible to photograph correctly.
In person this color is much more bold and much more bright.

The formula was so incredible that I questioned whether or not a white base was even necessary.
While most neon polishes are semi-sheer and require building, this particular shade was incredibly opaque and creamy.

I think I've found my go-to summer shade.
It makes my skin look nice and sunkissed, and I can imagine it's a flattering shade for just about anyone.


As much as this color stands out on it's own, I couldn't help but add a little something.


This bright shade needs to shine, so not wanting to stay inside too much longer I grabbed minimal supplies and went to work.


I knew I wanted to keep it simple with either stripes or dots, so I reached for a dotting tool and the Salon Perfect Nail Art Striper Polish in "White Out." 

Creating the look took no more than five minutes!

First, I simply drew three stripes with the white striper: the first being off center and twice as thick, followed by the two thinner stripes closer to the edges of the nail.

Taking the dotting tool and the white polish, I dabbed dots on alternating sides of one of the stripes to create a waved effect.

I then took the same dotting tool dipped in a dot of the CC polish and dotted down the line in between the two remaining white stripes.


It's quick, it's quirky, it's perfectly imperfect.


What do you think of this funky summer look?
Are you a Birchbox subscriber?

Let me know in the comments below and give this look some love on Facebook, Instagram, Tumblr and Pinterest.


If you're interested in becoming a Birchbox subscriber, you can sign up at Birchbox.com.
For $10 a month you'll receive 4 to 5 beauty samples and access to exclusive sales and specials on full size products in the Birchbox Shop.

You can also check out Birchbox on Facebook, Twitter and Instagram.
While you're at it, check out Color Club on Facebook, Twitter too!

Thanks for reading!

- Melody


**Birchbox subscription is paid monthly with my own money. This post contains referral links.

Wednesday, June 5, 2013

Preview: Ahoy there! Nautical Inspired French Manicure with Sailboat Accent Nail Art


Hi everyone!

If you follow me on Facebook and Twitter, then you know life is not returning to normal as soon as I expected. 

Today's post was originally a full collection review accompanied with an inspired nail art look, but in light of this afternoon's events I only have the nail art ready to share.

As hectic as things are, life's a beach on my nails!


The full review will be up tomorrow, but can you take a guess at what collection inspired this look?

Join in on this guessing game on Facebook or take a shot in the comments below.

Until then, thanks for reading!

-Melody

Sunday, May 5, 2013

L.A. Girl DIY Nail Art Kit Review Part Two: DIY Tiger / Zebra Stripes Tutorial


Hi everyone!

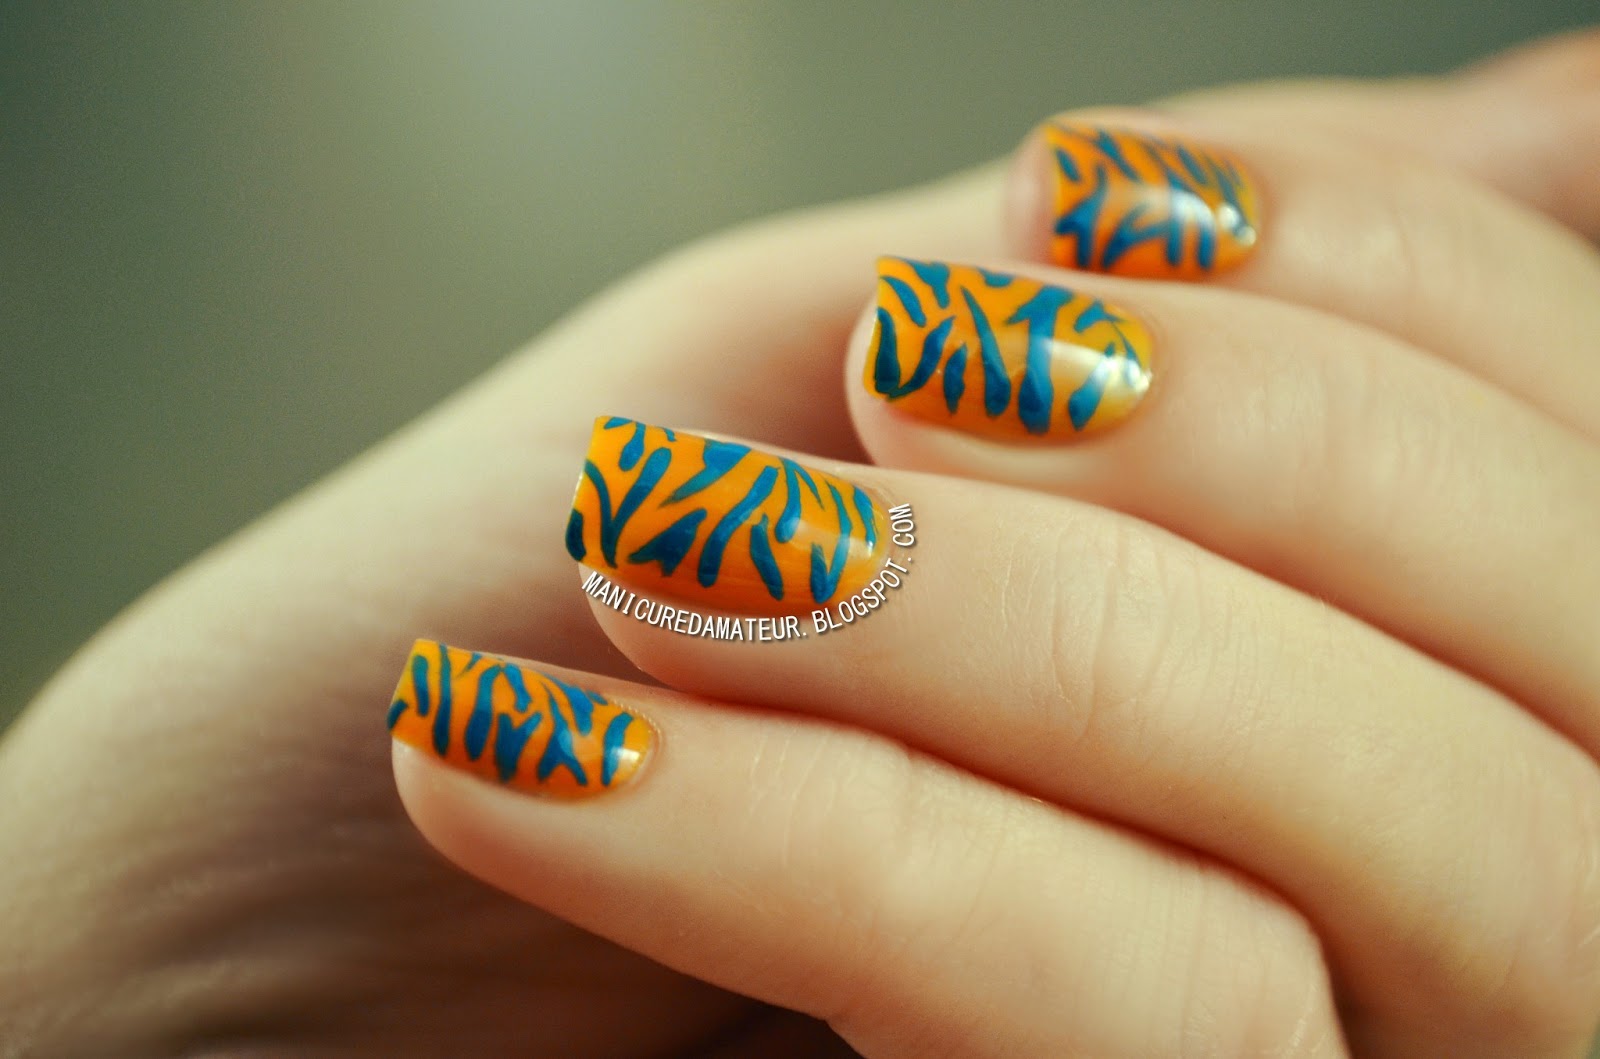
Today I have a fun and funky nail art design created entirely with the L.A. Girl DIY Nail Art Kit.

For more information on the contents, pricing, and availability of the nail art kit, along with swatches of the individual colors included, you can jump over here to read the first part of the  review.

Now on to the design!


DIY Zebra/Tiger Stripe Nail Art


What you'll need:

For this look we're going to use the blue and orange polish from L.A. DIY Nail Art Kit in Flashy, along with a small nail art brush which is provided in the package.


The following products are not included, but I also recommend a base and top coat, along with a small angled brush for any needed cleanup.
The small angled brush is an old EcoTools angled eyeliner brush.


The Steps

Step 1. 
Start with clean, bare nails. You can skip the base coat if you don't have one, but it is highly recommended to add a clear base to protect your natural nail before polishing. 

 Step 2. 
Apply two to three coats of the orange polish, giving each layer enough time to dry to prevent dragging and streaking.


1. 2.


 Step 3.
Drip a dot onto a piece of paper or other palette. Take the small nail art brush and dip the end into the dot.


Draw a curvy line onto your nail by starting at the outside and drawing inward in a wispy motion.

                                                                                    Step 4. 
                                    Draw another line on the other side, slanting the line in the other direction. 


3.    4.     


Step 5. 
Begin to fill in the rest of you nail with the same technique. I recommend working from the center outward to prevent any unwanted gaps. 
Try not to overthink the design. It's okay for the lines to be bumpy and uneven. If fact, it looks more realistic!

Step 6. 
Once you are happy with your design, give the stripes at least 15 to 20 minutes to dry depending on how thick you applied them. 
If needed, clean up around your nail using a Q-tip or what I recommend - a small angled brush, which is more precise for cleaning around the cuticle area. 
Add your favorite top coat, and enjoy! 


5.  6.


That's it!
It's actually a really quick design that even a first time nail artist can do.
It doesn't require extreme precision and the color combinations are endless.


I hope you enjoyed this tutorial and let me know in the comments below if you try it yourself!

Don't forget to give this look some love on Instagram, Tumblr, and Pinterest,
and keep up with The Manicured Amateur on Facebook, Twitter and Bloglovin' because there are more L.A. Girl DIY Nail Art Tutorials coming your way.

Thanks for reading!

-Melody


*The L.A. Girl Nail Art Kit was provided for my honest review. Any material provided does not influence my opinions in any way. Gotta keep it real!
Related Posts Plugin for WordPress, Blogger...