

homeaboutcontactdisclosure
Showing posts with label sally hansen. Show all posts

Friday, June 14, 2013

Sally Hansen Sugar Coat Texture Collection Swatches and Review


Hi everyone, TGIF!


You asked for it, and you got it!
I asked my Facebook fans to choose between the Sally Hansen Sugar Coats and The Avon Cosmic Collection for my next post.

At the time I went to bed it was a tie, but SH was voted first so I went with these.
In truth, Avon ended up getting an extra vote after I started, oops. That's up next, I promise!


It took me awhile to actually find this collection near me, and I stalked CVS everyday until they put out the display.
It paid off! I scooped every single one before anyone else knew they were even there. 


The Collection


The Sugar Coat Collection is Sally Hansen's take on the texture trend, consisting of the following eight 3D matte shades:

From back left to back right:

Sugar Fix
Cherry Pop
Bubble Plum
Cotton Candies
Sweetie
Sour Apple
Razzleberry
Lich-O-Rich

The Sugar Coat collection can be found in most Walgreens, CVS, Rite Aid, Target, and Walmart locations and usually range from $5-6 each.


The Colors

All of these have the exact same formula.
While all except for Sugar Fix and Sweetie can be left at one coat, it is recommended to use two. If left at one the sugary finish may appear patchy and not evenly develop.
(I use one coat on all except Sugar Fix and Sweetie to demonstrate.)

The actual texture is a matte, but the base is not.  I actually prefer it this way as it emphasizes the effect.


Cherry Pop is literally a bright cherry red.


Cotton Candies is a bold bubblegum pink.


Bubble Plum is a fuschia like purple-pink.


Sugar Fix is a stark white.


Sweetie is a banana yellow.


Sour apple is a bold mint green.


 Razzleberry is a rich cerulean blue.

WARNING: This one stains horribly. I only wore it for five minutes and faced a whole day of stained cuticles after removal.


 Lich-O-Rich is black, but the texture makes it appear more charcoal.
This one best displays what happens if left at one coat.


Overall

I'm pleased with the collection for the most part. 
As rich as the colors are I wish the texture would have held at one coat. 
It's a minor concern considering applying two coats is an easy step for fast drying textured finishes.

My only disappointment is in Razzleberry, which would have been my favorite had it not been such a pain in hiney. 
Staining is a major thumbs down for me, but at least it was only bad one in the bunch.

In general I still prefer my textures to have a bit of sparkle, but these are cute basic colors and are a great option if you're short on time.


Which is your favorite of these sugary shades?
Have you hopped on board the texture trend train?

Let me know in the comments below or share your thoughts on Facebook, Twitter or Instagram.

Coincidentally, this month's theme for Sally Hansen's I Heart Nail Art Challenge is textures!
For more information on how to enter and the prizes you could win, visit here.

Thanks for reading!

-Melody

Monday, June 10, 2013

Born Pretty Store Cosmiss Nail Polish Review + Half Glitter Half Texture Nail Art!


Hi everyone!
Today I have a quick post of another polish brand from Born Pretty Store.

Now if you read my review on Born Pretty Store's March Nail Lacquer, then you already know I was pleasantly surprised with the quality of their polishes. (if not, you can read it here.)

These Cosmiss Candy Color Glitter Sparkle Yogurt Series Varnishes are new to BPS, and once I saw them I knew I had to try one out.


They have no names, but this is Cosmiss #3, a semi-sheer, milky light olive green with ranbow hexes, round and fine glitter.


For how much glitter is packed in this baby, it went on like butter.
The base is really sheer and will take atleast three layers to reach the full opacity as shown in the photos.
My main surprise was how flat the glitter sits on the nail.
I did use a top coat to give it a nice, even glossy finish.

I know it's kind of snot colored, but I like it. I love interesting colors, and this one is definitely that.
And the glitter so dazzling who even cares what color the base is, haha.


If this particular base color isn't your taste, not to worry!
Born Pretty Store has got you covered with 10 different glittery shades to choose from for $4.36.

You can purchase them here and get 10% off you entire purchase using my special promo code BHL91!


I got so excited about this polish, I rushed to create a quick nail art look using my new Cosmiss beauty.


I grabbed a few quick items and went to work.


 Already having the Cosmiss varnish applied, I picked up a roll of nail tape and taped off half of each nail starting from the upper left corner, down to the lower right corner of each tip.

Using Sally Hansen Sugar Coat in Lich 'O Rich, I painted the lower half of each nail and then quickly but gently pulled off the tape while the polish was still wet.

I know I've neglected to officially share the SH Sugar Coat collection with you yet, but it's coming I promise!


I could have stopped there, but I was too excited over a few more goodies I received from Born Pretty Store.

I turned to my nail wheel of half pearls and added a red one to the center of each nail by placing a dot of top coat where I wanted the pearls to be. 

The pearls are easy to pick up and handle by taking a dotting tool or toothpick that has just a tiny bit of top coat on the tip.

(Want the pearls for yourself, you can get them here for $4.74)


After the fact I realized the red makes them look like clown noses. But hey, it matches the glitter right?

I'm quite happy with the look and I'll  definitely be getting my hands on more Cosmiss varnishes as soon as I can.


What do you think of this Cosmiss polish?
Are you a fan of my bad clown party-like design? 


Let me know in the comments below, and give it some love on Facebook, Instagram, Tumblr and Pinterest.

Don't forget I'm having a giveaway at 500 Facebook followers, so spread the word!

Thanks for reading!

-Melody


**Products in this post were purchased by me with my own money.

Saturday, May 18, 2013

Free-Hand Dog and Paw Print Nail Art


Hi everyone!

Sorry I'm late!

I thought I could keep posting at my normal rate while I tend to Odie, but after staying up with him all night I've confused my body into changing my sleep schedule to daylight hours. 
Some extra melatonin should get me back on track, but I still slept through a day or two without a post!

With my world revolving around the repercussions of the dog fight, I found it only fitting to create a look inspired by my furbaby. 

So today I have a free-handed nail art design to share with you full of glitter, paw prints, and a puppy portrait. 

I shortened my nails for extra precaution while caring for Odie's injuries, but don't worry. My extensive vitamin routine causes my nails to grow very fast.


My thumb (not pictured), index and pinky are sporting Hard Candy "Cocoa Smore" from the Candy Sprinkles collection. Swatches of the entire collection can be viewed here. I then chose to matify them using the Julep Matte Top Coat.

The paw print pattern on my middle finger was created with OPI's "Nein! Nein! OK Fine!" I began with a single coat for the base and followed with Julep's Matte Top Coat once again. I then took a medium sized dotting tool to create the paw prints. 


My ring finger was free-handed utilizing a couple of small nail art brushes and a dotting tool for his eyes and nose. 

I began with two coats of Sally Hansen Complete Salon Manicure in  "Bocha Mocha." 

Taking a small nail art brush, I began working in the different tones of Odie's fur using OPI "Don't Pretzal My Buttons" (a light nude) for highlights and Julep "Olivia" (a dark brown) for shading. 

The area around the nose and eyes were created using OPI "Nein! Nein! OK Fine!" Any highlighted areas were used by mixing in a bit Julep Eileen (a stark white), which was also used for the eyes.

The darkest parts of the nose and the pupils of his eyes were dotted in with Sally Hansen Hard As Nails in "Black Heart." 
I'll admit, I exaggerated the eyes a bit. He's usually squinting, but it wouldn't translate properly on the nail.

I finished the design with a generous coat of Out The Door Top Coat.


I want to thank everyone again for the well wishes for Odie. 

After a long, exhausting week of worry and tending to his wounds I finally can rest assured that he is going to make a full recovery. 

The major puncture wound in his leg has finally drained (gross, I know) and is beginning to close, meaning the antibiotics have flushed out the infection before it spread. The swelling has almost completely diminished and Odie is able to walk again! He also ate some food for the first time today. :)

He's back to his happy, sappy self...well, minus the shame he feels wearing his ecollar.
...and from the cats trying to steal his food!


Now that things are getting back to normal, I have lots of things planned for upcoming posts here at the Manicured Amateur. 

My no-buy has been lifted and I'm going to have lots of new goodies on the way to share with you, plus requested tutorials and a look into my nail care routine!


So keep up with me on Facebook, Twitter, and Bloglovin' 
and give this look some love on Instagram, Tumblr, and Pinterest!

Thanks for reading!

-Melody

Sunday, April 28, 2013

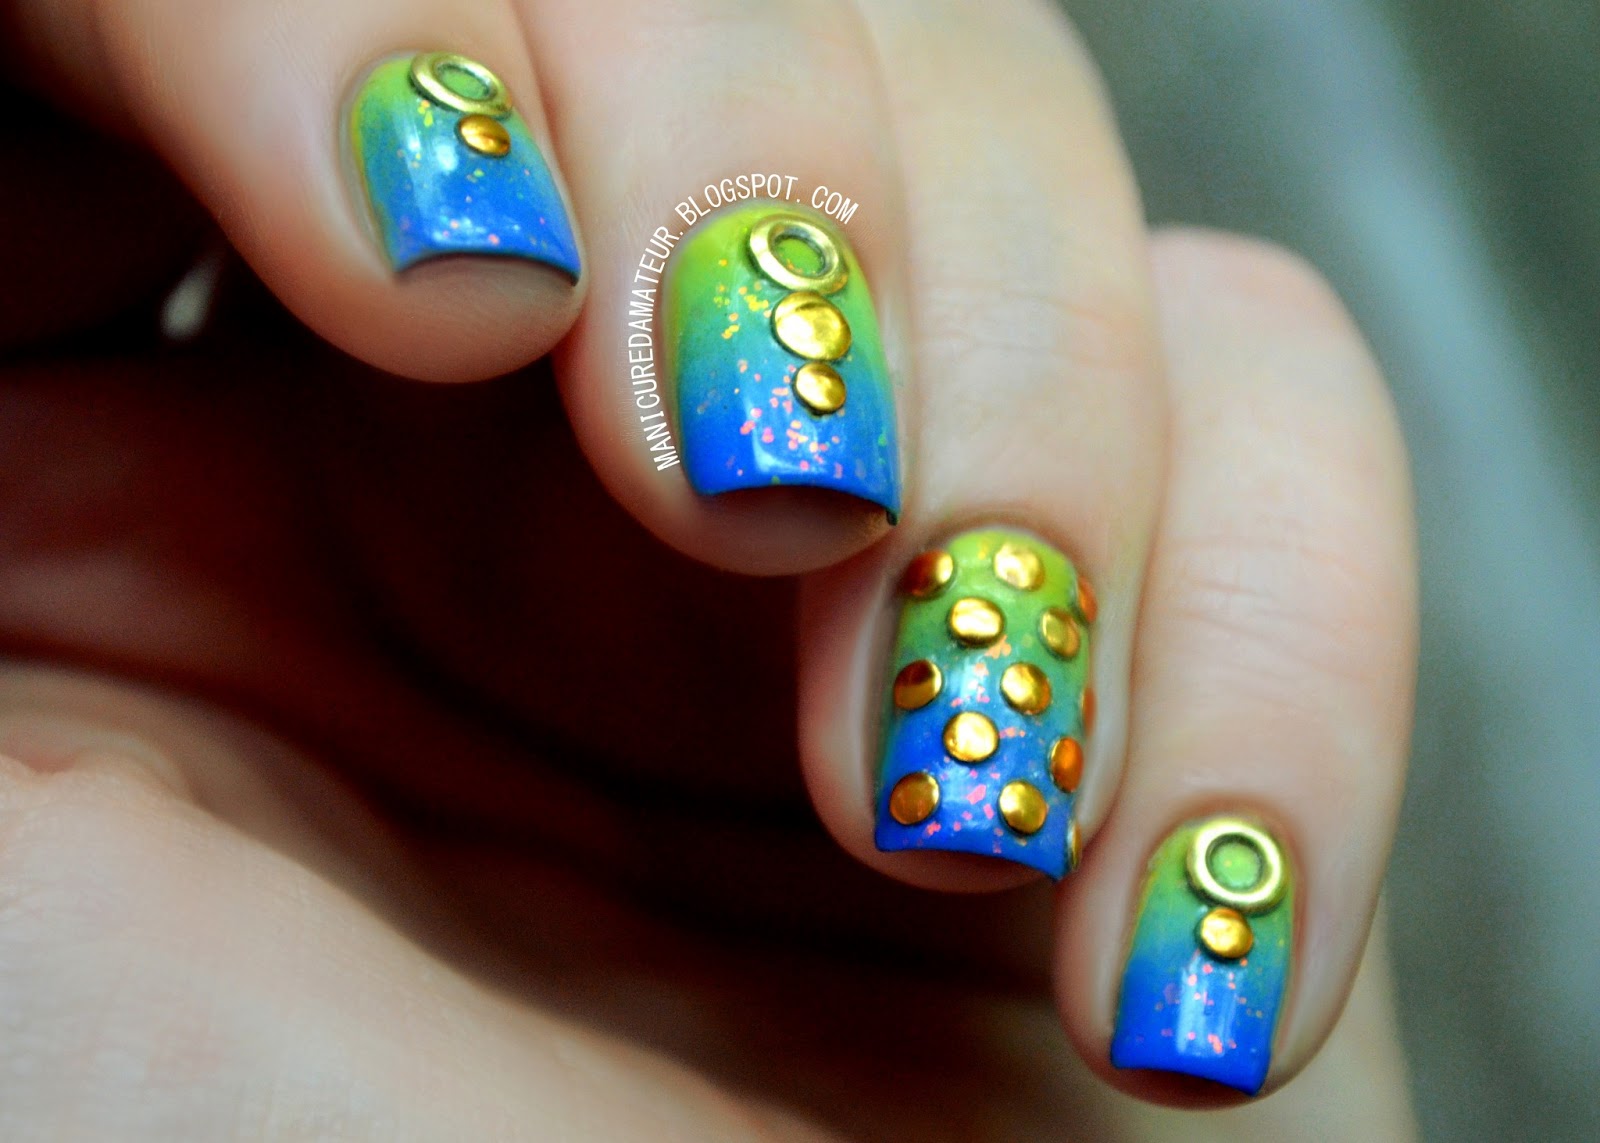
Treasures of the Sea: Yellow to Blue Gradient and Round Stud Nail Art

Hello everyone!

As many of you know I am preparing my house for the move in of yet another roommate
That makes for three, 20 something year-old males and myself. Even three out of the four animals are boys.
Needless to say it's a madhouse here, and unfortunately it's been at the expense of my lightbox.

I had to apologize for the inconsistencies with the lighting of my photos lately, but don't fret! My boyfriend and I are hard at work custom building me a new one.


Today I wanted to share with you another nail art look that doesn't hesitate to shine.

The rain is back in the peach state, but the beach is still on my mind. This design was created with the idea of the sun on the sea, and the treasures hidden underneath.

Okay, so admittedly the idea came to me when watching The Little Mermaid. I am not ashamed. The glittery ocean world with golden castles and crowns was inspiration I just couldn't ignore.


I began with a neon yellow base using Avon Inspire

To recreate the look of sun shining through water, I used Avon Inspire, Serene Green, and Sally Hansen Hard As Nails Pacific Blue to create a bright, primary gradient that's Disney approved.

To emphasize the concept and add a little sparkle, I added one coat of eyeslipsface (e.l.f) Fairy Dust. The pink flakies really only reveal themselves in sunlight, and the pink is even a subtle ode to Ariel's hair (and my own).


While I may not have a gold crown of my own, I used three varieties of round studs from Born Pretty Store to give this look the royal treatment. They are applied by simply painting a top coat over the gradient, picking up the studs with a wax-based pencil or orange stick and placing the studs in the desired spots. I just use an old, white eyeliner pencil that I was allergic to and it works great.

 I sealed the entire design with Out the Door top coat, and voilà!


The end result is fit for a mermaid, a princess, and all polished lovelies under the summer sun. 
It's beach and pool proof, as the studs really stay put.

I won't lie, with my long red hair I definitely felt like the Little Mermaid.
By the way, did you know her daughter's name was Melody in the sequel? Too bad she had black hair.


What do you think of this design?
How do dress your nails for days by the sea?

Share you summer mani must-haves in the comments below and give this look some love on Facebook, Instagram, Tumblr and Pinterest!

Thanks for reading!

-Melody

Friday, April 12, 2013

NOTD: Neon, Black and White Pueen Nail Stamping Plates Preview

Hi everyone!

So the work from my original post was lost due to a brief power outage from these horrible storms.
I don't remember Georgia ever having this many tornado warnings this early in the year, but scurrying to the basement is becoming a weekly routine.


I didn't want to leave you hanging, so I thought I'd show you a preview of the Pueen Stamping Plates I've been playing around with lately.


I stumbled across Pueen Cosmetics on Amazon. These standard plates are available as a 25 piece set for $18.99. 
They're official website appears to be closed temporarily, but you may visit the Amazon page where I purchased them here.


For these nails I used plate PUEEN13. 


I began with a white base of China Glaze White on White.
With a standard size stamper and old gift card as my scraper, I used Sally Hansen Black Heart to apply the design leaving the top 4th of my nail unstamped.

Unfortunately the design didn't come come off the plate completely. I think the circles were just too large of a  space for the polish to handle. I did my best to fill in any incomplete areas with a small nail art brush, but it still came off a bit wonky. I also drew a black line across the top of stamped area to separate it from the open space.

I filled in the gap with Avon Inspire and sealed everything with Julep Matte Top Coat.


This image has given me the most trouble so far and the matte finish was questionable. Other Pueen plates with smaller images and patterns are picking up fine. 

I liked the idea of this in my head, but the execution was off...
not to mention my matte top coat is down to bottom of the bottle.

I wanna play with them just a bit more before I do a full review.


Is there a certain image from the 2013 Pueen Nail Stamping plates you'd like to see?
Have a favorite matte top coat you'd like to recommend?


Let me know in the comments below of give me a shout on Facebook and Twitter!

Happy Friday, and stay safe and dry out there!

-Melody

Wednesday, April 10, 2013

Polish Strip Showdown! Incoco Nail Appliques vs. Sally Hanson Salon Effects Real Nail Polish Strips Review & Comparison

Hello everyone!

Today I want to discuss the now trending "real nail polish strips." 
It's nail art for the non-nail artists, and I'm going to show you how they work, how well they work, and who'll they'll work for.

Are you ready for a polish strip showdown? If so, keep on scrolling!


As a polish addict, I was actually turned off by the idea of nail art that didn't involve the process of actually painting my nails. But leave it to Birchbox and Cravebox to make me step out of my comfort zone.

The Incoco Nail Appliques were included in the March 2013 Birchbox, and the Sally Hansen Salon Effects Nail Polish Strips were included in the Bikini Ready Cravebox.

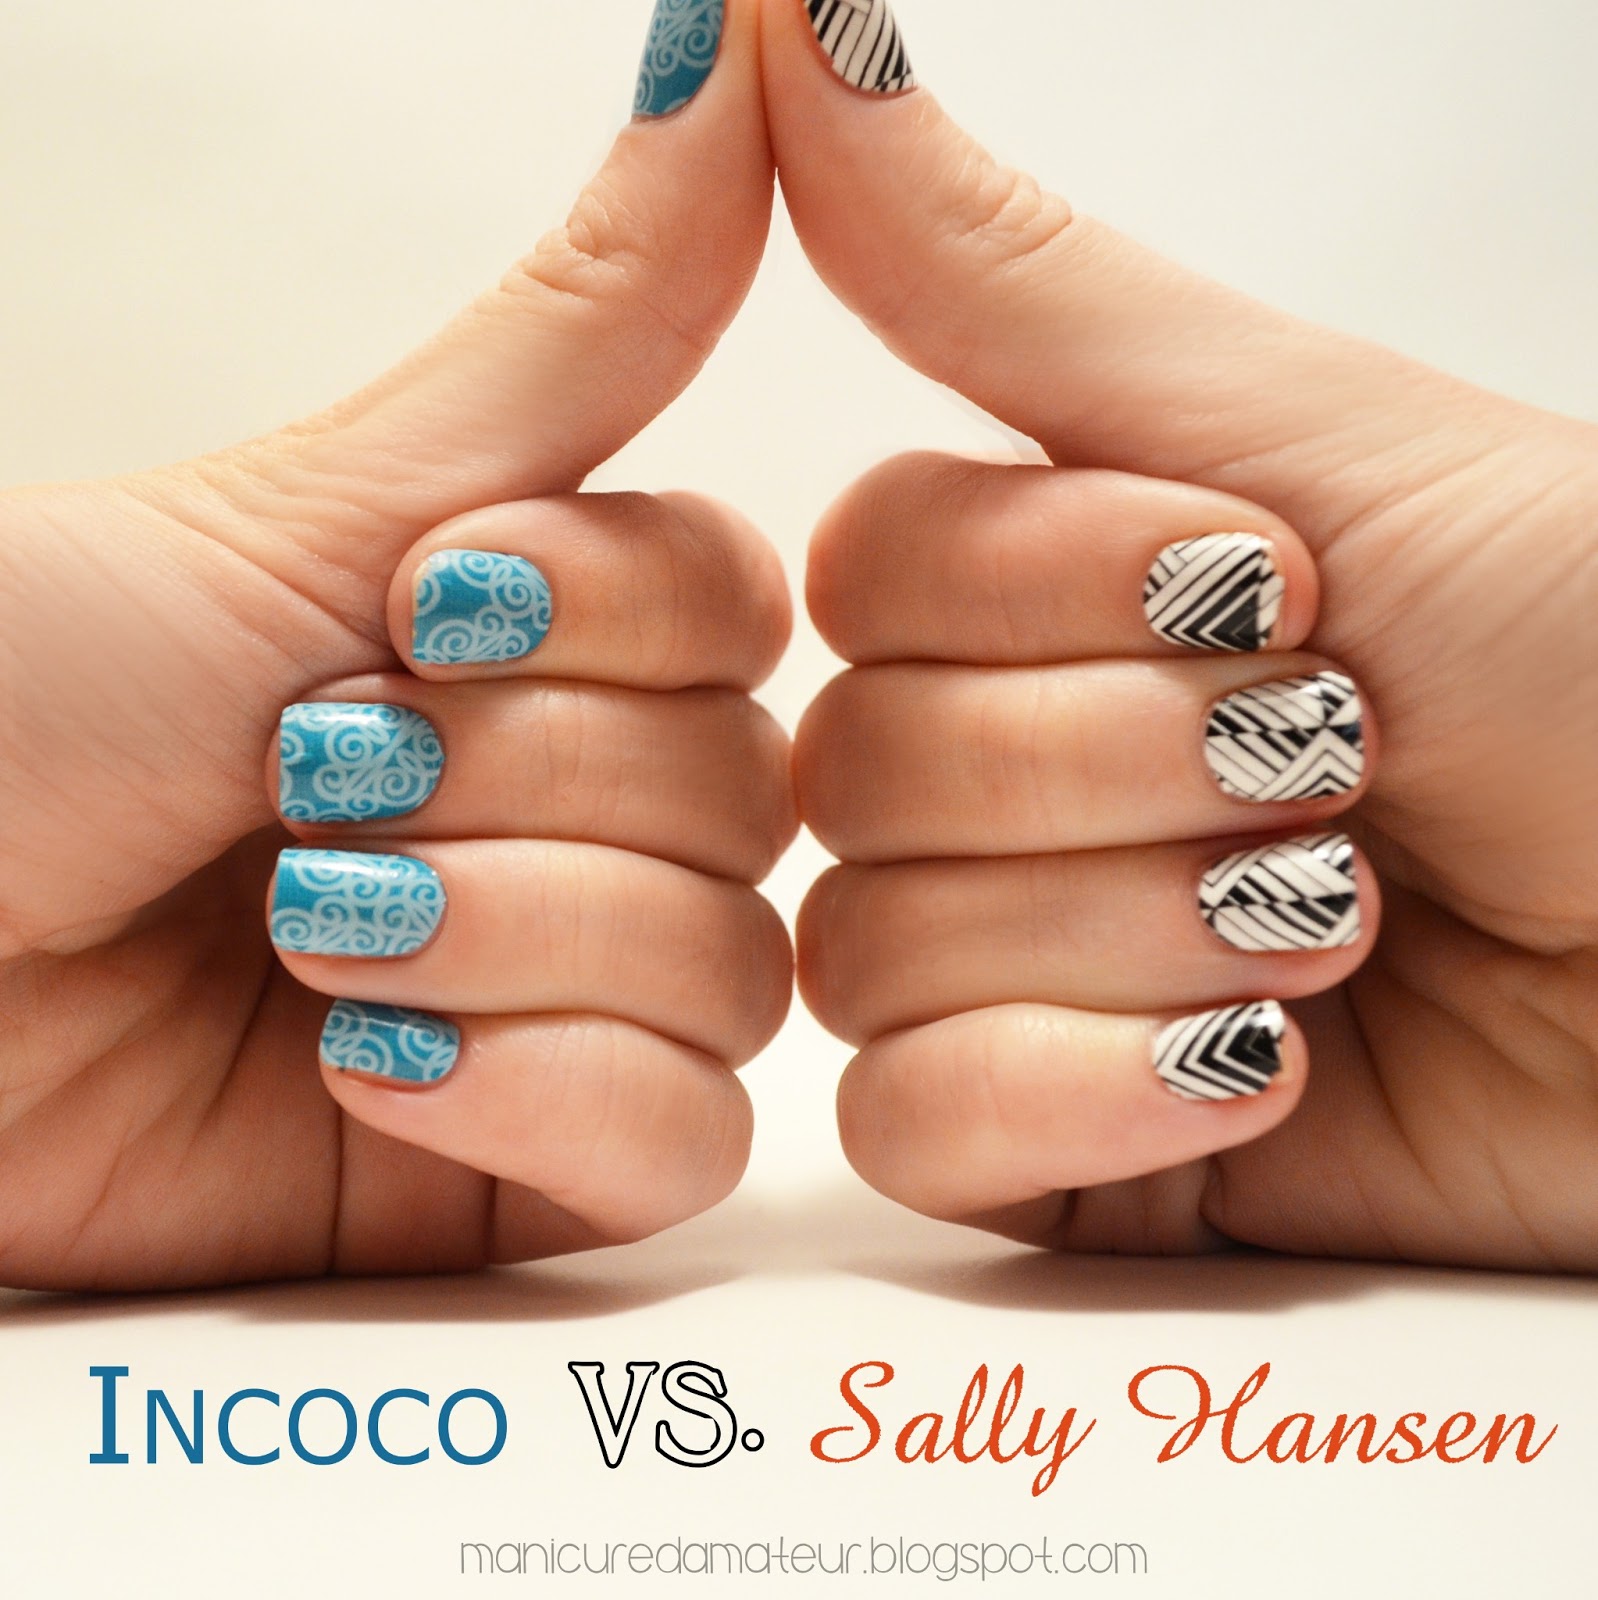
I thought I would take the opportunity to compare both brands. Let's first take a look at what's included with each product.

Contestant #1: Incoco Nail Appliques

The Incoco Nail Appliques are 100% real nail polish strips that come in a plethora of colors, designs, and finishes and are free of Formaldehyde, DBP (Dibutyl Phthalate) or Toluene.

Single shade manicure and pedicure strips are available for $7.99.
Design manicure and pedicure strips are available for $8.99.
French manicure strips are available for $9.99

Pictured below are the design manicure strips in Spring Vines, but to shop all the options visit Incoco.com.


Each package contains two rows of eight double-sided strips that can be stretched to conform to your nail shape along with a strip of silver tape to reseal any unused strips. 
They are advertised to last up to 14 days as they contain base coat, polish, and top coat all in one.

Instructions for use can found on the back of the package.


Contestant #2: Sally Hansen Salon Effects Real Polish Strips


The Sally Hansen Salon Effects Real Polish Strips are free of Formaldehyde, DBP (Dibutyl Phthalate) or Toluene, and are made of 100% real nail polish.

There are currently 40 varieties available, all of which can be viewed at sallyhansen.com.


They can be purchased wherever Sally Hansen products are sold and usually range from $7 to $9.

Pictured below are strips in the pattern "Tri-bal It On."


Each package contains two plastic and foil wrapped packets containing eight double ended nail polish strips, a mini sized  3-1 Emory/buffer board, double-ended cuticle stick and instruction page.

The all inclusive strips also contain base coat and top coat and are claimed to last for up to 10 days.

Tutorial

The process of applying the nail polish strips is identical between both brands, so I only chose one for the full demonstration.

Below is an illustrated guide, followed by some helpful hints to make the process go even smoother.


Tips from the manicured amateur:

1. Both brands claim that the strips can be stretched to fit the width of your nail if you are between sizes. This process didn't really work for me. So instead I chose a size just barely larger, hovered the strip over my nail, and just barely snipped the long edge until I was satisfied.

2. The directions of both varieties instruct you to immediately fold the excess strip downward and immediately proceed with filing. The problem is that the strips take a couple of minutes to fully adhere to the nail, so immediately grinding at them risks the potential of shifting. I suggest cutting the leftover strip, leaving just enough to fold under the entire tip of the nail. Trust me, this makes the filing part go much quicker.

3.  Unfortunately, while it's true that you do not have to be conscious of wet polish, you have to be conscious of peeling polish strips. Try to avoid contact with water, especially warm water, for the first couple of hours.

So how'd they hold up? Well, let's take a look...


The Matchup


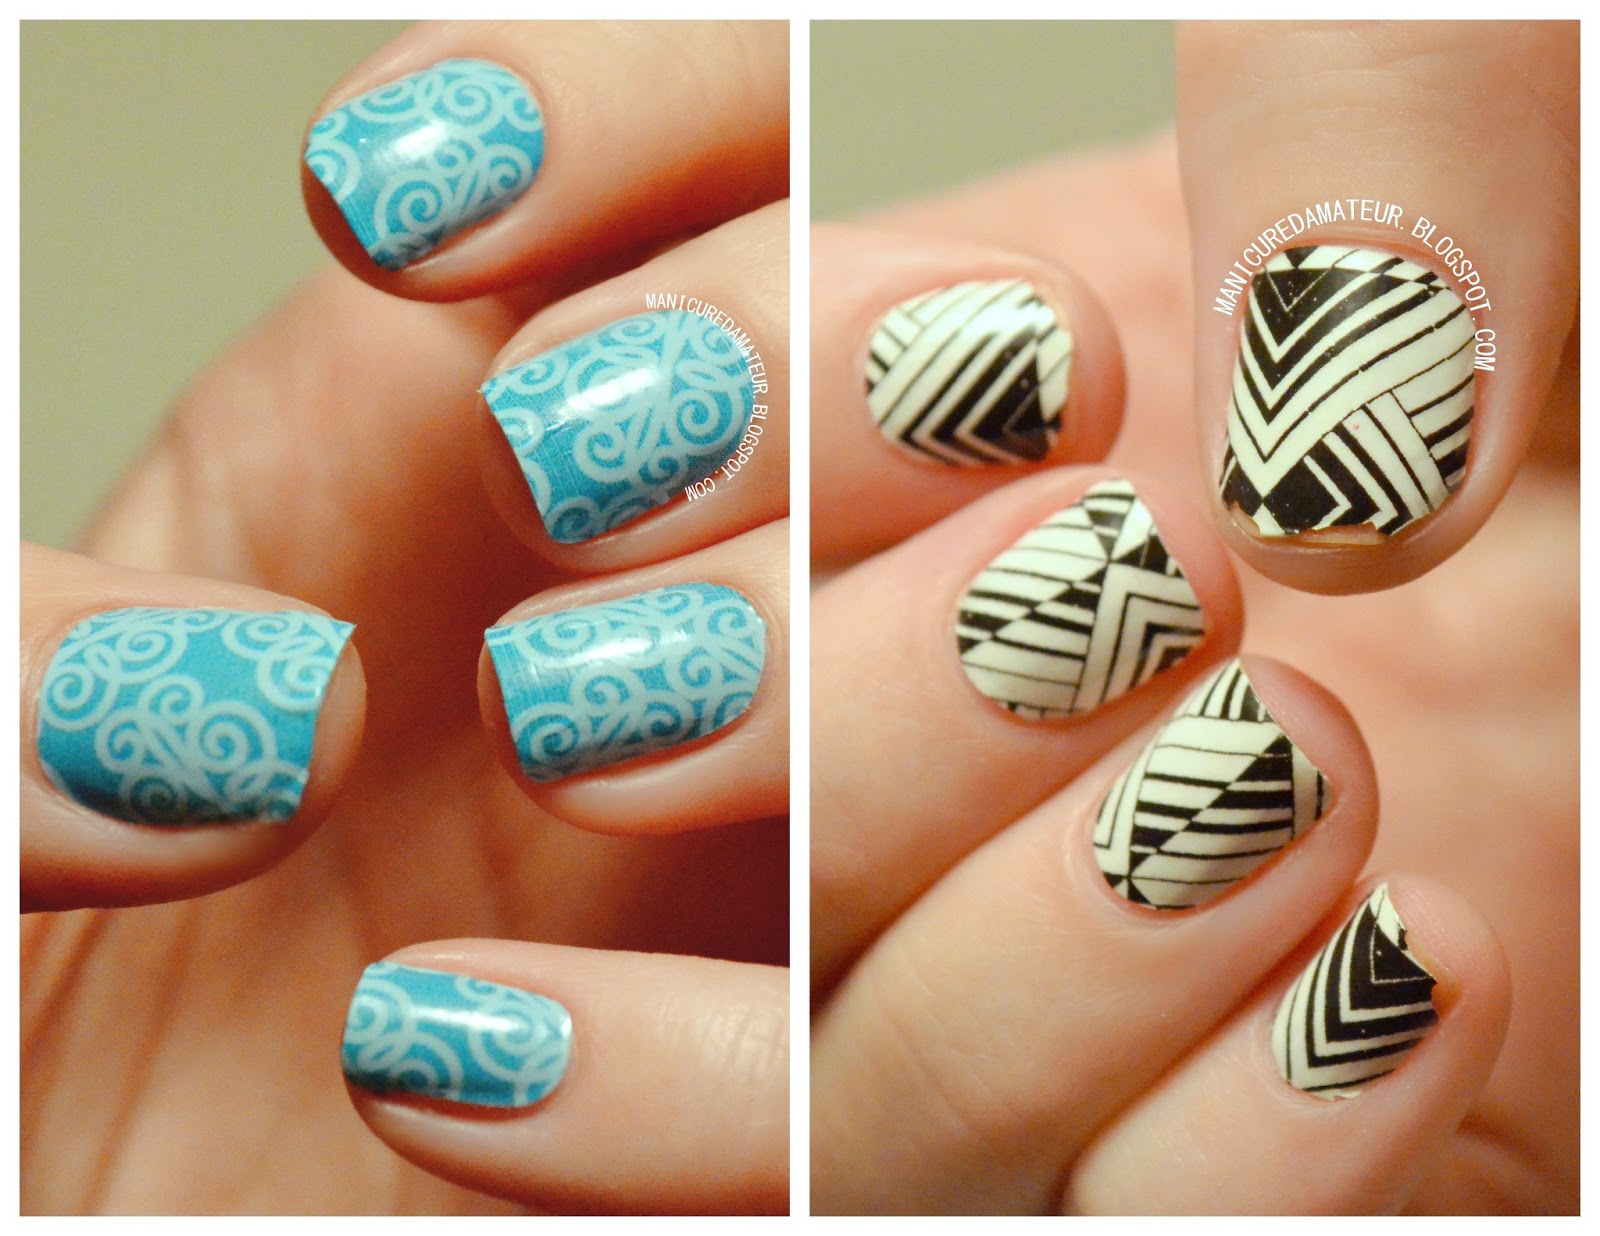
Below is the final result after one full day of wear. 

You will immediately notice certain characteristics of each brand.

Left: Incoco Nail Appliques in "Spring Vines." Right: Sally Hansen Salon Effect Nail Polish Strips in "Tri-bal It On."

So the first thing I'm sure you notice are the very visible chips on the Sally Hansen side, which began overnight. I woke up to the pointer finger curled up and peeling before I was even awake. The thumb and pinky finger followed suite when doing the dishes.

So much for 10 days right? Well...maybe. Not so coincidentally, these are my three nubby nails that had recently broken and had been filed down. I had trouble applying the strips in the first place as I was unable to fold over the excess and get the strip to fully adhere to the tip. Notice the other two nails are perfectly in tact.

The Incoco hand doesn't get off "scott free" either. While there were no visible chips, nearly every edge looked as if it was curling. Except for the noticeable fold in my nail, they actually weren't curling at all. I just couldn't get past how much it looked like a sticker.

While the camera might not have picked it up as much as  I needed it to, the Incoco strips also have weird lines that I assume to be "printer" marks. The Sally Hansen strips do not have this and looked much more authentic.


The Tally


So let's take break it down:

  • Price: Incoco - $8-10 + shipping. Sally Hansen - $7-9
  • Availability: Incoco - online only. Sally Hansen - online and in stores.
  • Variety: Incoco - I couldn't even count. Sally Hansen - 40 varieties.
  • Package: Incoco - 16 nails strips. Sally Hansen - 16 nail strips + file + cuticle stick.
  • Composition: SAME for both. 3-free. 100% real nail polish with base and top coat included.
  • Application: SAME for both, but more difficult for shorter nails.
  • Durability: Incoco - 14 day claim (no chips after vigorous use). Sally Hansen: 10 day claim (chipped less than 24 hours on short nails).
  • Appearance: Incoco - Visible edges, print lines. Sally Hansen - Clean edges, minor speckling.


So which one wins?


The Champion

SALLY HANSEN

Surprised? It came down to the simple fact that I change my nail polish every day, so I could care less if it begins to chip. In addition to that, I felt the quality of the design of the Sally Hansen strips were better, even if the strips themselves were not. 

Also, Sally Hansen is pretty much in every major retailer around me. If I choose to repurchase them, I can just walk across the street as opposed to paying extra money to wait around for a week to have them delivered.


That being said, the Incoco strips are more suitable for those who want the long-term wear. Giving credit where it is due, they stuck on better and stuck on longer. They also have more colors and designs to choose from and even release seasonal collections.


In the end nail polish strips aren't for me. The idea of nail polish strips make it seem like painting your nails is a chore. I am sure other polish addicts and bloggers alike will agree that it's part of the fun! Plus, if your polish messes up, you repaint the layer and go on with your day. If your nail polish strip messes up, you're plum out of luck.


So which brand do you think should have won the polish strip showdown? 
What do you think of nail polish strips as a whole?


Let me know in the comments below what you think of this concept and which, if any, you have tried.
You can also share your thoughts or recommendations on my Facebook and/or Twitter page!


Thanks for reading! I know this was a doozy.


-Melody

Related Posts Plugin for WordPress, Blogger...