


homeaboutcontactdisclosure
Showing posts with label studded. Show all posts

Monday, May 20, 2013

Summer Striping and Studded Ruffian Nail Art


Hi everyone!


Today I have a bright nail look for you!

Looking back through the designs I've posted I realized it's been too long since I've done a tape mani.
So today's design features a bright combo of stripes and studs.


The Steps

My thumb a pinky fingers began with a base of Essie Butler Please

I then took my striping tape and placed a small strip horizontally across the nails at an angle. I then cut smaller strips and placed them vertically in an angled but evenly spaced striped pattern, beginning from where I placed the horizontal piece.

I then took Sinful Colors Unicorn (swatched here) and eyeslipsface Mango Madness (swatched here) and painted within the stripes with a small, flat nail art brush.

While the polish was still wet  I removed the strips and finished with a line of studs from my Born Pretty Store stud wheel which you can purchase here (use code BHL91 for 10% off).

My index and middle finger began with a base of eyeslipsface Mango Madness

I went over the top third of my nail with Essie Butler Please to create a sort of exaggerated ruffian look that came to a rounded point. 
(Ruffian manicures are simply inverted half moons.)
I outlined the ruffian edge with Sinful Colors Unicorn with a long striper brush and finished with a single stud from the Born Pretty Store stud wheel.

My ring finger was created using the same method as my index and middle fingers, except I began with Sinful Colors Unicorn as my base and used eyeslipsface Mango Madness as the outline.

All nails were given one good coat of  Sally Hansen Ultimate Shield Base and Top Coat.


I really loved this color combination. It's bright and fun and a perfect match for the a day in the sun.


What do you think of  this bright design?

Let me know in the comments below and make sure to give this look some love on  FacebookInstagramTumblr, and Pinterest!


And keep up with me on Twitter, and Bloglovin' for more nail art looks and some exciting new collections I'll have to share with you soon!

Thanks for reading!

Melody

Sunday, April 28, 2013

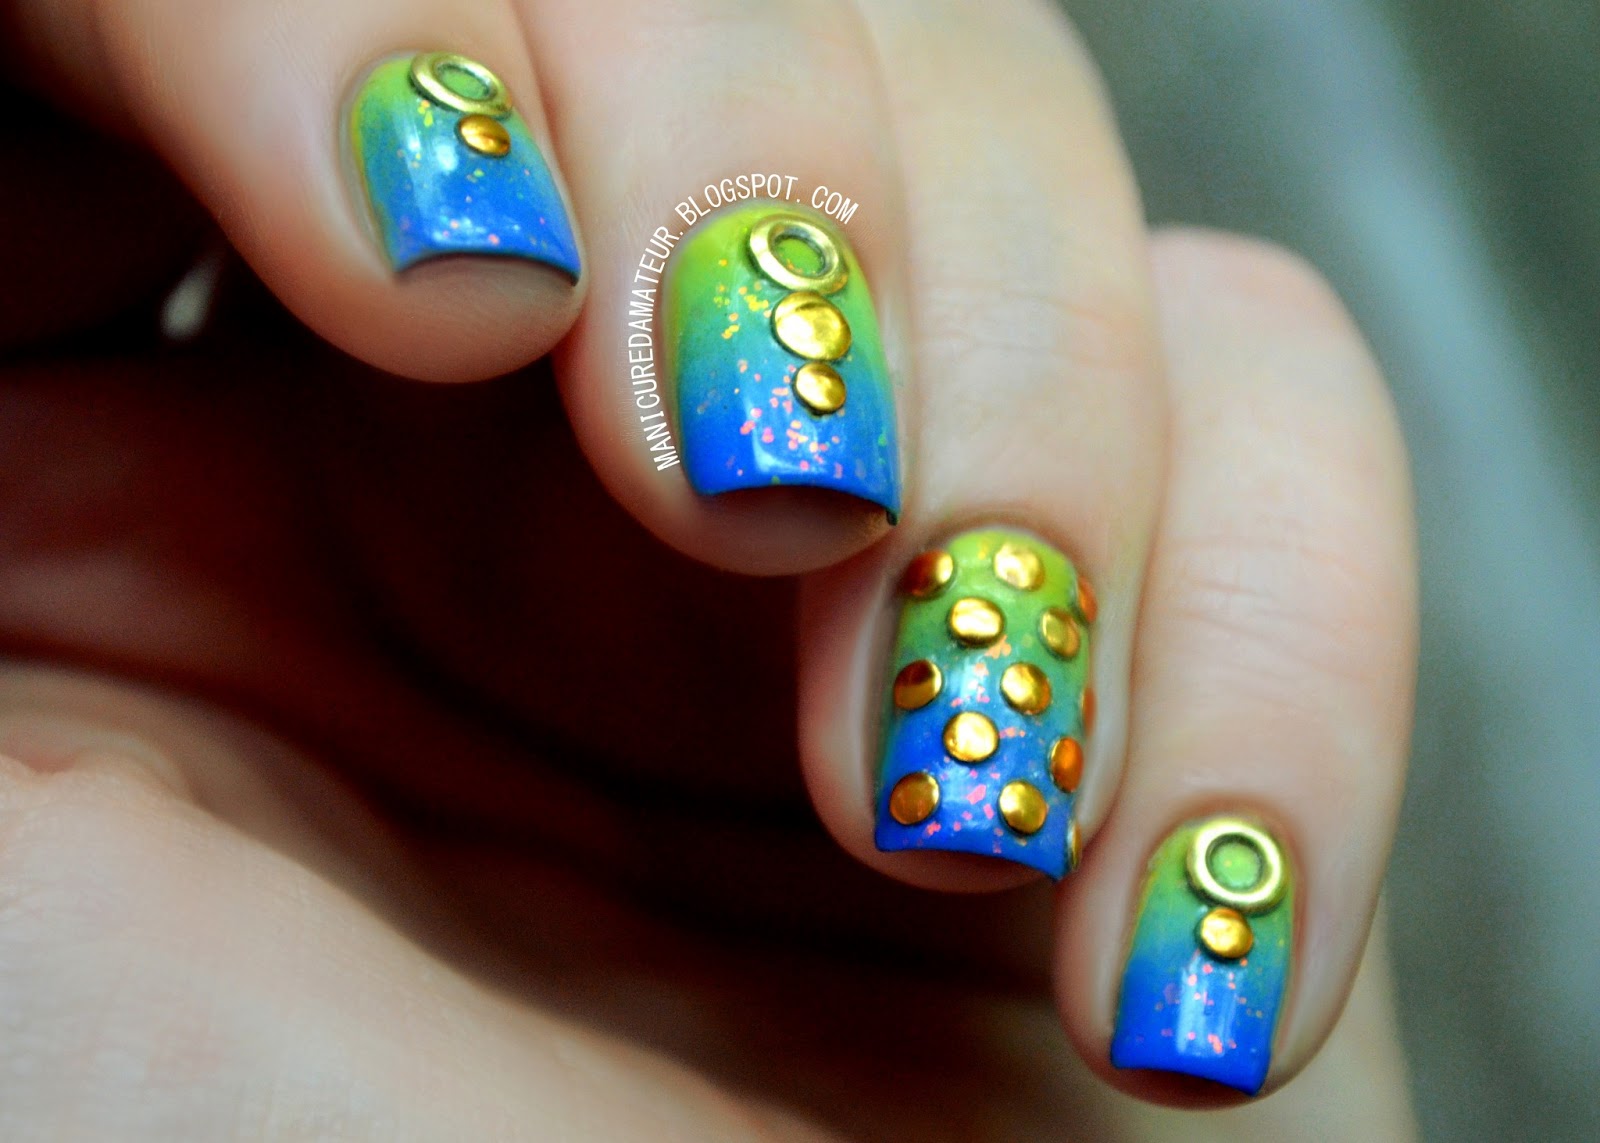
Treasures of the Sea: Yellow to Blue Gradient and Round Stud Nail Art

Hello everyone!

As many of you know I am preparing my house for the move in of yet another roommate
That makes for three, 20 something year-old males and myself. Even three out of the four animals are boys.
Needless to say it's a madhouse here, and unfortunately it's been at the expense of my lightbox.

I had to apologize for the inconsistencies with the lighting of my photos lately, but don't fret! My boyfriend and I are hard at work custom building me a new one.


Today I wanted to share with you another nail art look that doesn't hesitate to shine.

The rain is back in the peach state, but the beach is still on my mind. This design was created with the idea of the sun on the sea, and the treasures hidden underneath.

Okay, so admittedly the idea came to me when watching The Little Mermaid. I am not ashamed. The glittery ocean world with golden castles and crowns was inspiration I just couldn't ignore.


I began with a neon yellow base using Avon Inspire

To recreate the look of sun shining through water, I used Avon Inspire, Serene Green, and Sally Hansen Hard As Nails Pacific Blue to create a bright, primary gradient that's Disney approved.

To emphasize the concept and add a little sparkle, I added one coat of eyeslipsface (e.l.f) Fairy Dust. The pink flakies really only reveal themselves in sunlight, and the pink is even a subtle ode to Ariel's hair (and my own).


While I may not have a gold crown of my own, I used three varieties of round studs from Born Pretty Store to give this look the royal treatment. They are applied by simply painting a top coat over the gradient, picking up the studs with a wax-based pencil or orange stick and placing the studs in the desired spots. I just use an old, white eyeliner pencil that I was allergic to and it works great.

 I sealed the entire design with Out the Door top coat, and voilĂ !


The end result is fit for a mermaid, a princess, and all polished lovelies under the summer sun. 
It's beach and pool proof, as the studs really stay put.

I won't lie, with my long red hair I definitely felt like the Little Mermaid.
By the way, did you know her daughter's name was Melody in the sequel? Too bad she had black hair.


What do you think of this design?
How do dress your nails for days by the sea?

Share you summer mani must-haves in the comments below and give this look some love on Facebook, Instagram, Tumblr and Pinterest!

Thanks for reading!

-Melody
Related Posts Plugin for WordPress, Blogger...