


homeaboutcontactdisclosure
Showing posts with label gold. Show all posts

Tuesday, June 18, 2013

Avon Cosmic Collection Swatches and Review (Part One)


Hi everyone!

Today I finally have the Avon Cosmic Collection to share with you.
I caught word that these polishes were coming, and checked the site everyday until I could finally scoop up the whole set.

These polishes required special attention, and the only way to accurately demonstrate each shade is to photograph each one both outdoors and in, so both parts of this review are VERY pic heavy.

Apart from balancing blogging with preparing for my move, preparing this collection took much longer than expected with the ongoing storms interfering with my photographs.
In short, tornadoes + no power = hiding in the basement in the dark with no internet. 
Bummer Summer 2013.

So let's see the beauties before the clouds come back!


The Collection


The Avon Cosmic Collection consists of ten shimmery shades that reveal an ambiance of holographic sparkle.

The polishes are available individually for $6.00 each.

You can purchase through your local Avon representative who can be located via the "Find A Rep" page on Avon's website.
If you want to save some time, you can enter "Julie Pruitt, Tennessee" on that page to shop online through my dear family friend (my mother's "BFF," haha).


The first part of this review displays the warmer half of the collection in the five following colors:


From left to right:

Radiant
Starlight
Saturn
Supernova
Starburst


The Colors

Every shade in the collection has an incredible formula. the consistency is just perfect.
While every shade could be left at one coat, if you were to look close enough you'd still see the nail poking through. I recommend two coats for best coverage.
Even though these are scattered and not linear "holos," I still chose to go without a topcoat. 
It is known to polishers that top coat can reduce the linear holographic effect, but the actual holo shimmer in these is so subtle that I chose not to risk it.
Despite the extra protection, they seemed too wear well without chipping.
(I say that, but keep in mind I wear no color for more than 24 hours unless it's on my toes.)


The only thing that separated these shades in terms of formula was the amount of holo goodness.
In short: the lighter the shade, the weaker the holo.

And the effect can really only be noticed in direct sunlight with the exception of a couple of shades. In most lighting situations it comes off as just a silvery microshimmer.

Let's take a closer look, shall we?

Remember, the first two photos of each shade will be direct sunlight and the other two will be indoors under daylight bulbs.


Radiant is a light gold with holographic shimmer.


See how subtle? It's definitely a soft and scattered holo, but it's a true gold with shimmer perfect for the holiday season.


Indoors the holo disappears, but an angelic shimmer remains.


Starlight is an odd mustard-like, greenish yellow with holographic shimmer.


I could barely find the holo even under the sun. 
You can catch a glimpse of it in the second photo, but the bright color really steals the show.


Once seen indoors, I realized how much holo the shade really had to begin with.
Suddenly the different tones disappear and I was left with an interesting yellow that for some reason made me crave thanksgiving dinner.


Saturn is a semi-burnt orange, leaning on a red-orange with the same holo shimmer.


I think I've found my favorite orange polish EVER. This is fall in a bottle. The holo in this one gives off every tone you'd fine in falling leaves, leaving me with only about a million nail art ideas come fall.


Even indoors, the holo tries to stick around. Obviously not as bright, but just as beautiful. 

The color itself takes on a more reddish hue, and I love it either way.


Supernova is a rosy-red with holographic shimmer.


Notice the bolder the shade, the bolder the holo pattern? 

Under the sun this shade makes me think of Julie G Gumdrop Collection (which I reviewed here some time ago). 
If you could take Hot Cinnamon and Sugar Rush, nix the texture and mix them together, you'd get this exact shade.


Indoors this color transformed more than any other them.
It became a lighter, more pinky red while the holo goes into hiding.


Starburst is a deep fuschia with a stronger holo shimmer.


 The holo is strong with this one, compared to the others at the very least.
Outdoors you won't miss it.


Indoors the shade leans a bit more on the purple side, but is rich and beautiful.


 Which one of the cosmic colors shines for you?
What do you think of the scattered holo?

Let me know in the comments below, and keep your eyes peeled becoming the second half of the collection is coming right up!

Thanks for reading!

-Melody


Sunday, April 28, 2013

Treasures of the Sea: Yellow to Blue Gradient and Round Stud Nail Art

Hello everyone!

As many of you know I am preparing my house for the move in of yet another roommate
That makes for three, 20 something year-old males and myself. Even three out of the four animals are boys.
Needless to say it's a madhouse here, and unfortunately it's been at the expense of my lightbox.

I had to apologize for the inconsistencies with the lighting of my photos lately, but don't fret! My boyfriend and I are hard at work custom building me a new one.


Today I wanted to share with you another nail art look that doesn't hesitate to shine.

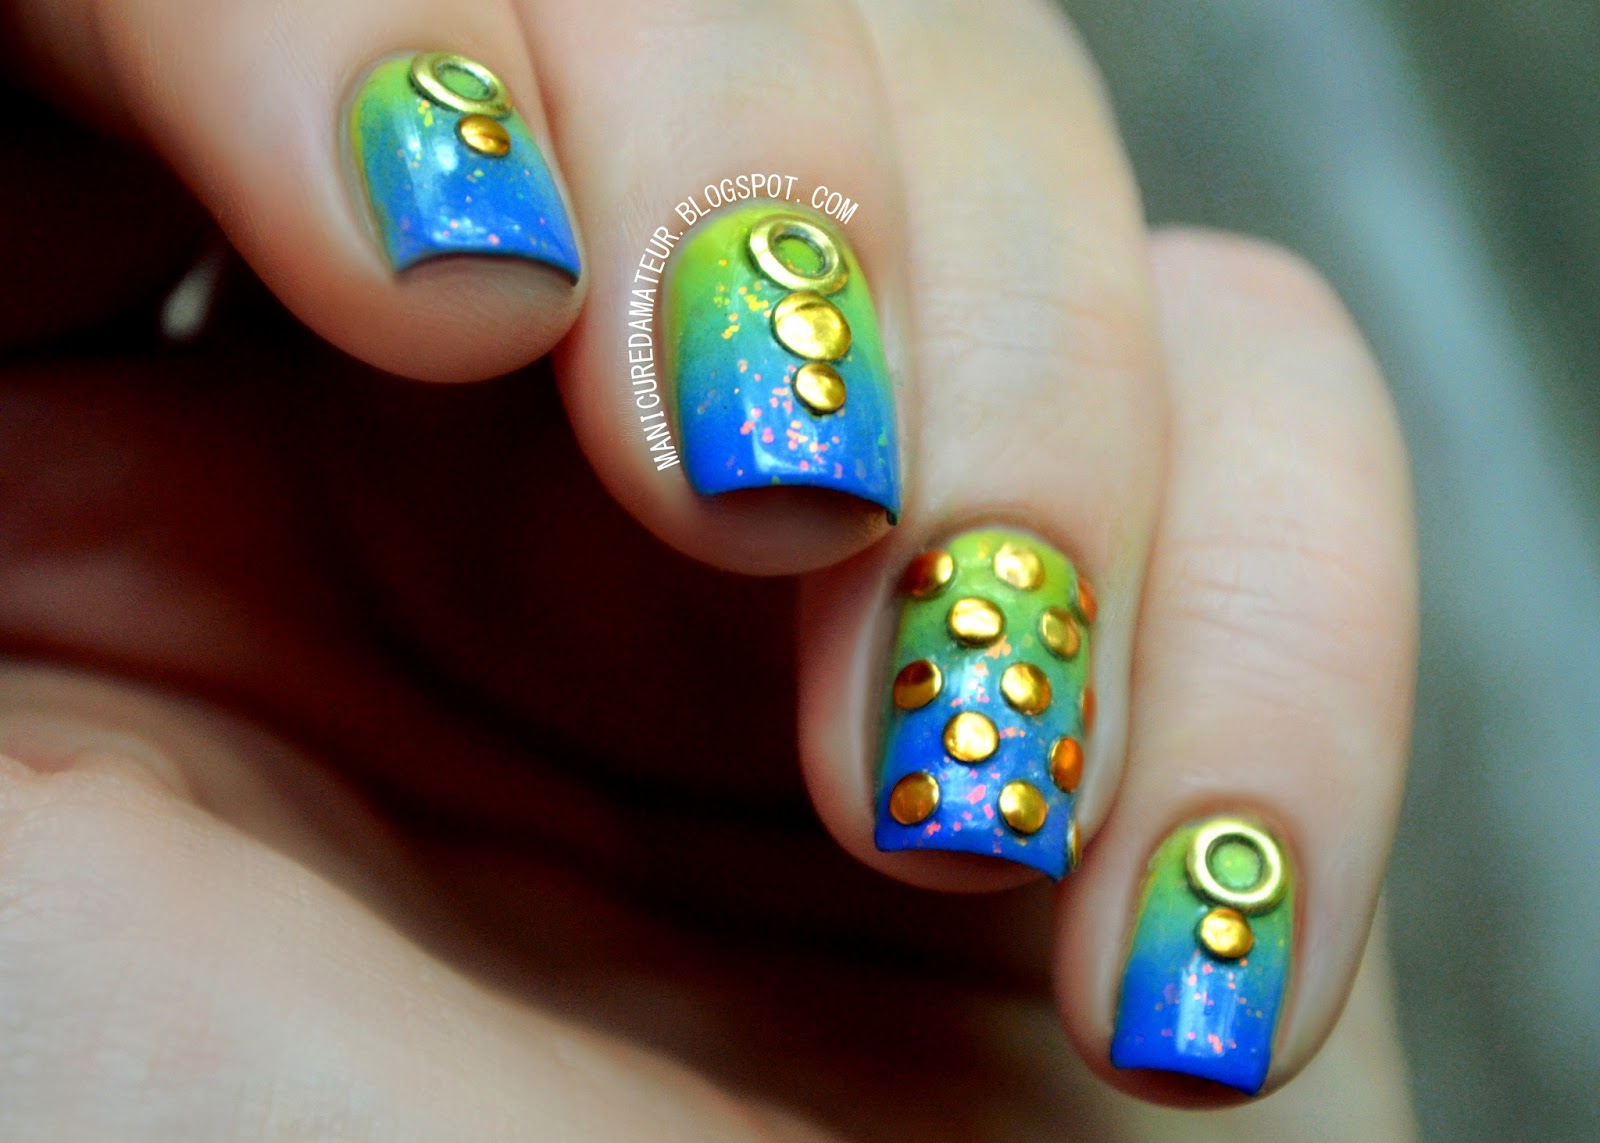
The rain is back in the peach state, but the beach is still on my mind. This design was created with the idea of the sun on the sea, and the treasures hidden underneath.

Okay, so admittedly the idea came to me when watching The Little Mermaid. I am not ashamed. The glittery ocean world with golden castles and crowns was inspiration I just couldn't ignore.


I began with a neon yellow base using Avon Inspire. 

To recreate the look of sun shining through water, I used Avon Inspire, Serene Green, and Sally Hansen Hard As Nails Pacific Blue to create a bright, primary gradient that's Disney approved.

To emphasize the concept and add a little sparkle, I added one coat of eyeslipsface (e.l.f) Fairy Dust. The pink flakies really only reveal themselves in sunlight, and the pink is even a subtle ode to Ariel's hair (and my own).


While I may not have a gold crown of my own, I used three varieties of round studs from Born Pretty Store to give this look the royal treatment. They are applied by simply painting a top coat over the gradient, picking up the studs with a wax-based pencil or orange stick and placing the studs in the desired spots. I just use an old, white eyeliner pencil that I was allergic to and it works great.

 I sealed the entire design with Out the Door top coat, and voilà!


The end result is fit for a mermaid, a princess, and all polished lovelies under the summer sun. 
It's beach and pool proof, as the studs really stay put.

I won't lie, with my long red hair I definitely felt like the Little Mermaid.
By the way, did you know her daughter's name was Melody in the sequel? Too bad she had black hair.


What do you think of this design?
How do dress your nails for days by the sea?

Share you summer mani must-haves in the comments below and give this look some love on Facebook, Instagram, Tumblr and Pinterest!

Thanks for reading!

-Melody

Monday, April 22, 2013

E.L.F Essential Spring 14 Piece Nail Cube Swatches and Review (Part Two)


Hi everyone!

Today I have the second half of the eyeslipsface (e.l.f) Spring Essential 14 Piece Nail Cube to share with you.

If you missed the first half of this review, you can jump over here and see the rest of the collection and get more information on pricing and availability.


The Collection

For the second half of this review I will be showcasing the following:


From left to right:

Mint Cream
Lavender Mist
Skinny Jeans
Chic Confetti
Gold Star
Dream Maker
Fairy Cream (I think this is actually Fairy Dust and my sticker is just a misprint)

[Mint Cream, Skinny Jeans, Chic Confetti, Gold Star, Dream Maker, and Fairy Dust (same as Fairy Cream) are available in full size bottles.]

The Colors


Mint Cream is a deep, duusty mint creme. Fitting name, right?

e.l.f. "Mint Cream"


We've all seen plenty of mint polish releases this year, but this one stands out among the crowd. It's skirts the line of being more of seafoam green than a mint green, but it still counts. I'm in favor of this one because it's more suitable for all seasons because of its muted tone. It's also more flattering for those weary of brighter green polishes.

In addition to the color itself, the formula couldn't be better. Smooth and opaque in one coat, and super glossy even before top coat. I did, however, have yet another hair come off the brush into the polish, but reapplication is a simple remedy.


e.l.f. "Mint Cream"


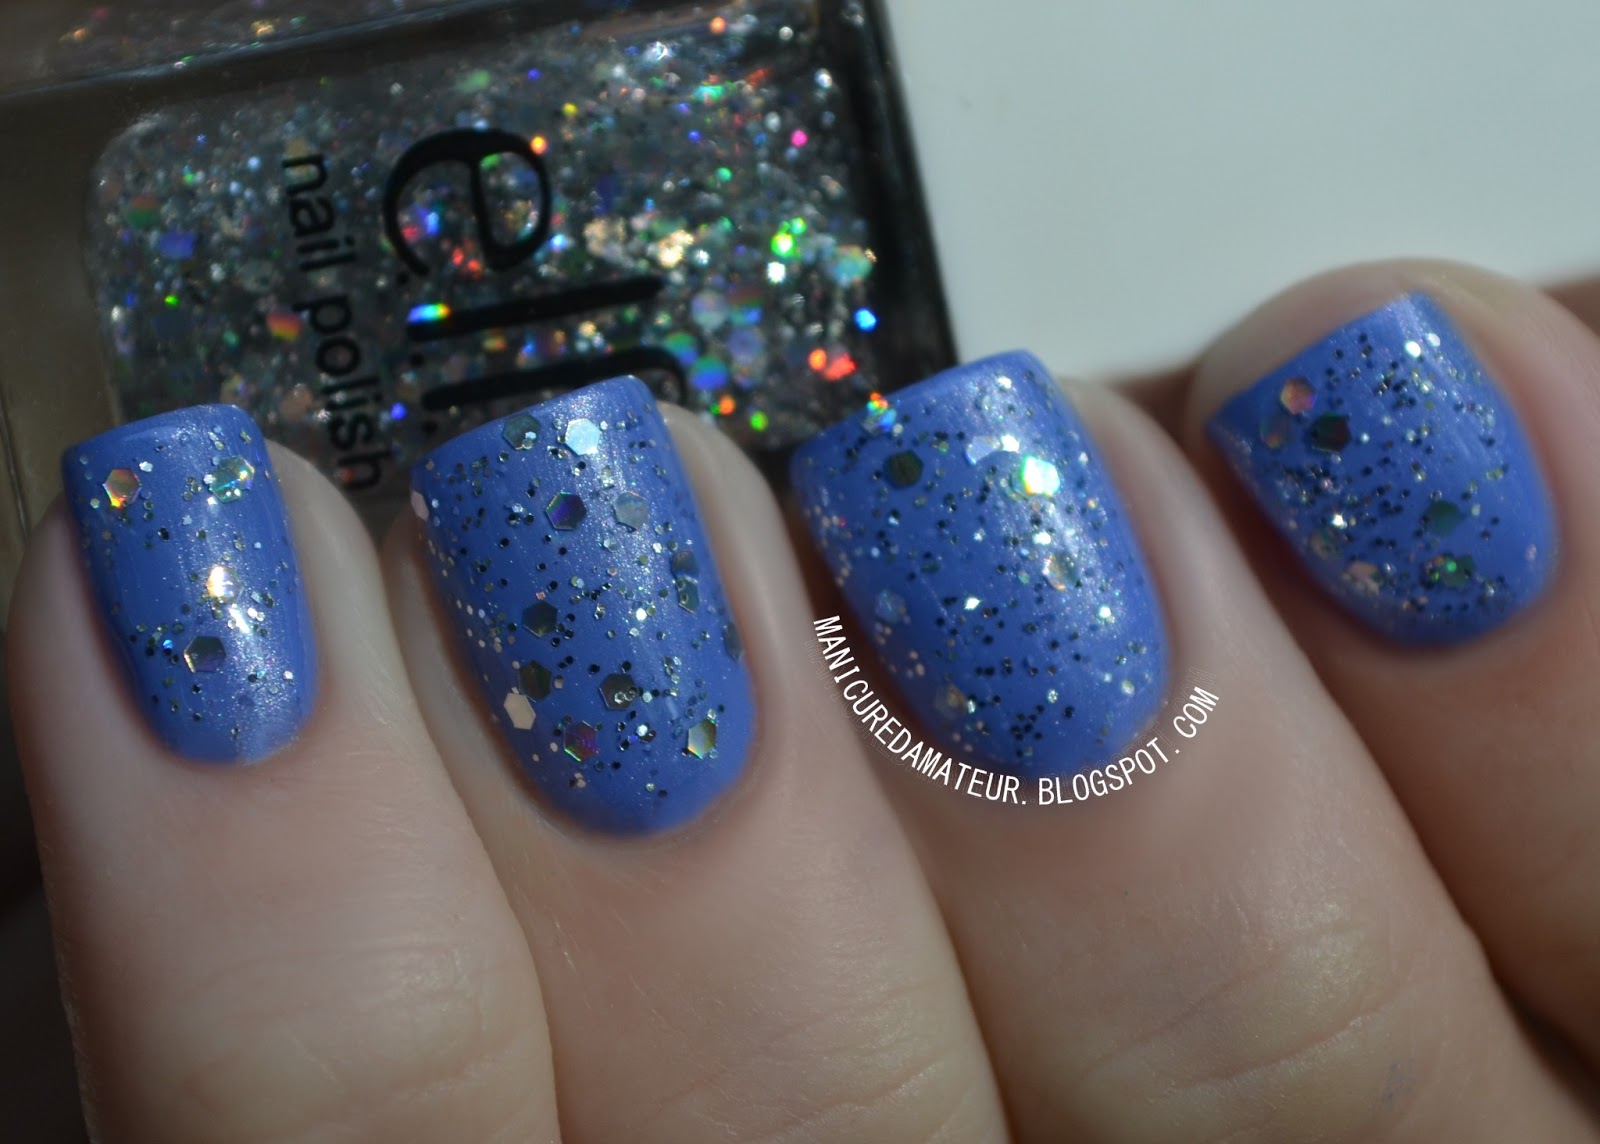
Lavender Mist is a bright periwinkle blue with silver microshimmer.

e.l.f. "Lavender Mist"


I assumed this was going to be a frost like the other two shimmers in the collection, but the brush strokes almost completely disappeared as the color dried. The brush did cause minor streaking, but two coats smoothed everything out. 

I'm a sucker for periwinkle, and a shimmery periwinkle is hard to come by.

e.l.f. "Lavender Mist"


Skinny Jeans is glossy blue creme.

e.l.f "Skinny Jeans"

This shade had the thinnest formula of them all, taking three coats to reach total coverage.

It's a pretty basic blue. There's no real wow factor here, but it does compliment the rest of the collection.

e.l.f. "Skinny Jeans"


Gold Star is a gold mix of fine and small hex glitters suspended in a clear base.

e.l.f. "Gold Star"

This is a great, basic, gold glitter mix depending on how you wish to use it. If you want to achieve the sprinkled look as I have demonstrated above, then this is a steal. The glitter sits so flat you don't even feel it when you run your fingers across the nail.

The reason behind this is also it's downside. The base is really thick. Unfortunately this means that it's extremely difficult to maneuver the glitter around and just about impossible to place a single glitter in a specific area. I basically had to dab it on and hope for the best.

I definitely like the end result, it's just shame that it's not more versatile. 

I know my photos are kind of funky, but since I'm back outside shooting (temporarily) I had to angle my hands down to avoid some major glare from the glitter. 

e.l.f. "Gold Star"


Dream Maker is a holographic mix of fine and small hex glitters suspended in a clear base.
e.l.f. "Dream Maker"


The formula for Dream Maker is nearly identical to Gold Star, but for some reason I had a much harder time getting the hex glitters out of the bottle. 

Even though it took some extra effort, I got the same beautiful result. 


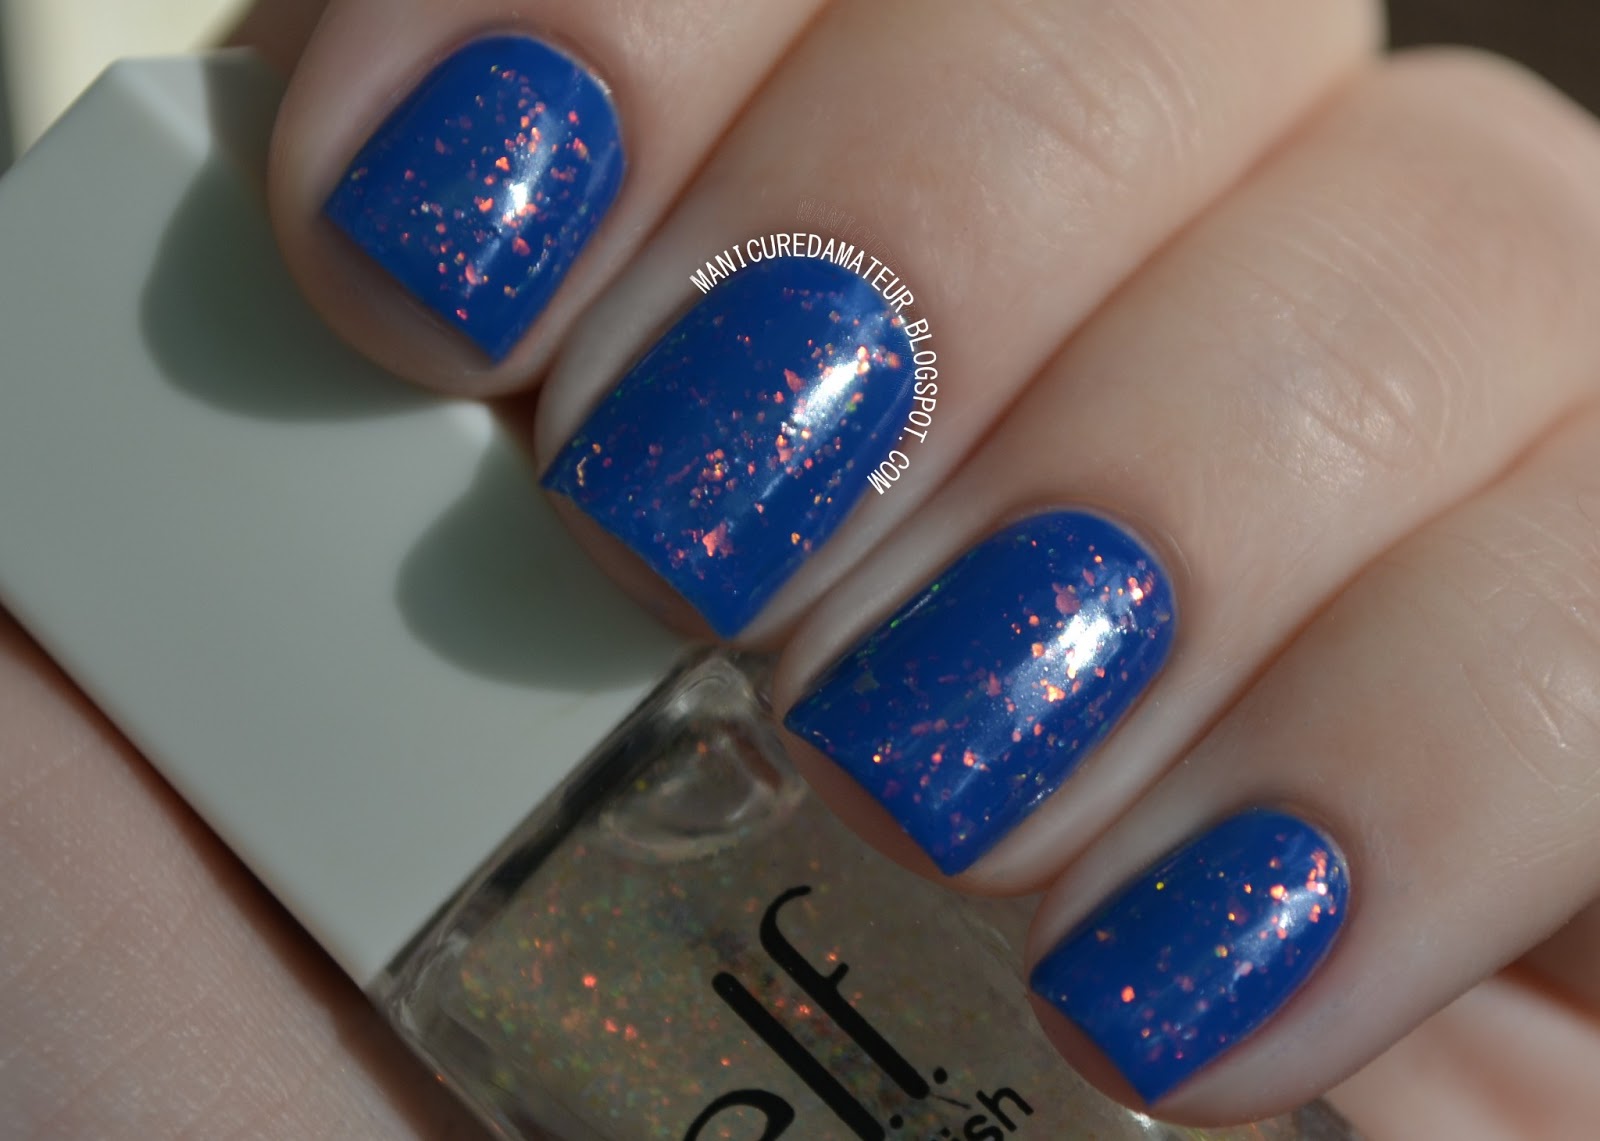
Fairy Dust/Cream consists of tiny, iridescent flakies suspended in a clear base.

e.l.f. "Fairy Dust/Cream"

As with all iridescent finish polishes, Fairy Dust/Cream is extremely camera shy without indoor lighting. That being said, the flakies are more sparse than other iridescent finishes such as Color Club's "Snow Flakes." 

This can actually be a good thing as it allows you to control the intensity of the effect. This was much easier to work with than the previous two mixes. I used two coats for the photos above, but this is in direct sunlight where the effect gets a bit lost.

e.l.f. "Fairy Dust/Cream"


Chic Confetti is colorful mix of round and small hex glitters suspended in a clear base.

e.l.f. "Chic Confetti"


Multicolored  glitter mixes like this are a dime a dozen, and this one isn't all that special.

The formula was a bit more manageable than Gold Star and Dream Maker, but not by much.

I don't hate it, I just have many others like it.

e.l.f. "Chic Confetti"


Overall


Now that I've seen the collection in its entirety, I'm more able to look past my qualms with the brushes. Losing hairs into the polish is still unforgivable, but once I got used to the behavior of the brush I was able to see the polishes for what the really are. 

For $14 dollars you get 14 polishes in a variety of colors and finishes. Deal or no deal isn't really the question here. Of course it's a bargain, but only if you like the colors. While some of the shades are pretty basic, a few stood out as my favorites:

Flirty Fuschia and Mango Madness still rank as my top two, but Mint Cream, Lavender Mist, and Fairy Dust are a few that I'm 100% sure I'll be turning to again.


What were your  favorite shades from the collection? 
Will you picking up this nail cube anytime soon? 
What about as a gift?


Let me know in the comments below and shout out your favorite gift ideas for the polish-loving mother figures in your life.


And don't forget to keep with the Manicured Amateur on Facebook, Twitter, Bloglovin' and all the other little social media outlets by clicking the buttons in the top right-hand corner.

Thanks for reading!

-Melody


Monday, April 15, 2013

Metallic Manicures with the Avon Party Polish Mini Set (Swatches/Review)


Hi everyone!

We all know metallics are taking the spotlight in fashion this year. 
From head to toe, glints of glittery clothes and accessories have been headlining the runways as a big trend for just about every season of 2013.

Today I want to share with you the Avon Party Polish Mini Set I snatched up from their online outlet, as well  as two nail art looks to give you some illuminating inspiration.
(I'm really on a roll with alliterations today.)


The Collection

The Avon Party Polish Mini Set was a limited edition curated collection of four mini polishes for the 2012 holiday season. I purchased mine on clearance through the outlet section of their website for $4.99. 
It is no longer available there, but I know there are a few sets floating around on eBay.
The set included the following shimmery shades:


From left to right:

Starry Sky
Mystic
Golden Vision
Blushing Star


But don't fret! Only Blushing Star was limited edition.
Starry Sky, Mystic, and Golden Vision are available in full size bottles for $6 each through your local Avon representative, or online at Avon.com.

As always, if you are unfamiliar with an Avon rep in your area you can use Avon's "Find A Representative" page and either search by your location, or you can "Julie Pruitt, Tennessee" and order online through my Avon rep, a dear family friend.

**Limited Time Offer: If you order by midnight tomorrow, 4/16/2013, you can receive free shipping on your $15 order by entering code TAXDAY at checkout!

(This is how Avon always reels me in, I'm a sucker for free shipping.)


The Colors


Starry Sky is an icy silver foil.
Avon "Starry Sky"

The formula is as fantastic as the finish. It glides on a bit thin, but with two coats it's fully opaque and the shimmer is seamless.

If you are confused about what makes a polish a foil instead of a frost, the brush strokes are what separate the two. The strokes in a foil polish should be almost non-existent, as opposed to a frost where they are much more obvious.


Avon "Starry Sky"


Mystic is a very light bronze foil.
Avon "Mystic"

A couple of brush strokes were just barely visible in the pictures after two coats, but not in real life.

It's ethereal, it's flattering, and it makes your nails look like they belong to a Greek goddess.
Toga party anyone?

Avon "Mystic"


Golden Vision is a pure gold foil.
Avon "Golden Vision"

I say "pure gold" because this is one of the few perfect golds I own. It doesn't tint orange; it doesn't tint green. 
Heh, it's as a good as gold! (Tell me to stop, please.)


Avon "Golden Vision"


 Blushing Star is a rosy metallic pink with fine holographic glitter.
Avon "Blushing Star"

Blushing Rose is a bit different from the other three. It has a thicker formula and applied more frosty than the others. Most of the brush strokes disappeared as it dried, but some are still visible in the pictures above and in direct sunlight.

Avon "Blushing Star"


Nail Art Inspiration


As pretty as these shimmery shades are, full-on flashy fingers are not for everyone. There are plenty of ways to use metallic polishes as a simple accent to your regular mani. Beyond the tips, stripes and polka dots, here's a couple of ways to add some dazzle without your hand looking like a disco ball.


1. Stamping

Metallics coupled with intricate patterns lit up the runways during fashion week. If you can't see yourself sporting an outfit that resembles your curtains or bed comforter, try translating the look on your nails. You just might be surprised.


The model below is sporting a piece from Kenzo's Fall 2013 collection.

Photo Courtesy of Vogue.com

It was from the photo above that the mani below is loosely based upon. Starting with Avon Golden Vision as my base, I stamped the pattern using the plate Pueen14 with Sinful Colors Rain Storm. 

It wasn't meant to be identical, but you get the general idea.


2. Studs, Speckles and Splatters


When stamping is still out of your reach or you just want something a little less time-intensive, you can create this flaky effect with any metallic polish, a fan brush, seran wrap or anything similiar you might have lying around.

I started with Julep Lena as my base, and then took a small fan brush and dabbed on Avon Golden Vision with no particular technique. Just keep dabbing until you feel satisfied with the finish look, add some topcoat and viola!

I went a step further and added a few teardrop studs I purchased from Born Pretty Store.


Overall

I used to think metallic fashion was something to be saved for a flashy night out or a fancy occasion, but it just doesn't have to be that way. The Avon shimmer polishes are easy to work with in basic colors that can be integrated into almost any color scheme, making it easy to work them into more casual wear.


What do you think of Avon shimmer polishes? 
Are you into the metallic trend? 
Let me know in the comments below your favorite way to give your nails some sparkle.

You can always share your shiny manis on my Facebook or Twitter page.

Stay bright and thanks for reading!

-Melody
Related Posts Plugin for WordPress, Blogger...